Tuesday, January 21, 2014
Sunday, January 12, 2014
Why Learn Advanced Techniques?
This unit will develop the students' camera skills. They will learn how to manually set different functions of the camera. Now, that the students are familiar with what makes a good composition and successful photo, they are ready to advance their skills in the photography aspect.
We will watch a short video on Benjamin Edwards, http://www.youtube.com/watch?v=kVmiqZPHZ6E,who discusses why he feels it is important to be a photographer. How can one person make a change with their photos?
After watching the video, students will answer the following questions; If I had a chance, where would I go to take photos, knowing they will be seen, and hope they make a difference? Even if it is one person who is affected, isn't that worth it? Think about what images need to be seen and why. Find an example of an a photo you wish you would have taken. Share with group


Things to think about while searching for your subject;
1. Say more with less
2. Become a more interesting person
3. Ask questions with your photos
4. Photography is savoring life
5. Respond to what's happening
6. Photography pauses moments, and lengthens life
7. Bring your passions and interests into photography (reflect who you are)
We will watch a short video on Benjamin Edwards, http://www.youtube.com/watch?v=kVmiqZPHZ6E,who discusses why he feels it is important to be a photographer. How can one person make a change with their photos?
After watching the video, students will answer the following questions; If I had a chance, where would I go to take photos, knowing they will be seen, and hope they make a difference? Even if it is one person who is affected, isn't that worth it? Think about what images need to be seen and why. Find an example of an a photo you wish you would have taken. Share with group
Things to think about while searching for your subject;
1. Say more with less
2. Become a more interesting person
3. Ask questions with your photos
4. Photography is savoring life
5. Respond to what's happening
6. Photography pauses moments, and lengthens life
7. Bring your passions and interests into photography (reflect who you are)
Saturday, January 4, 2014
Advanced Camera Functions
ISO - rating of film's sensitivity to light. Low ISO, such as 100, is less sensitive to light and therefore needs more light to capture detail in an image; high ISO, such as 800, is more sensitive to light and needs less to capture detail. Low ISO creates higher-quality images and high /iso creates lower-quality images with visible grain.
![]() |
| low speed |
![]() | ||||||||
| high speed |
Switch the dial to M (manual), then push the menu button, select camera menu, scroll down to ISO, select your speed, then press ok. If you need to use the flash, press the flash symbol (lightning bolt with arrow) next to the arrow sign. Choose the option without the slash through it.
Aperture - hole or opening in which light travels through
When using the aperture priority mode, you have more control over the depth of field (distance between nearest and farthest object in a scene that appear sharp/in focus).
How to change settings on camera;
Switch the dial mode to A (Aperture). Keep in mind, the higher the number the smaller the opening. This means that less will be in focus in your picture. After choosing the Aperture mode, press the +/- symbol. This symbol will increase aperture, and the clock symbol will decrease. Look on your screen and it will display the changes. Choose different settings to see the difference between settings.
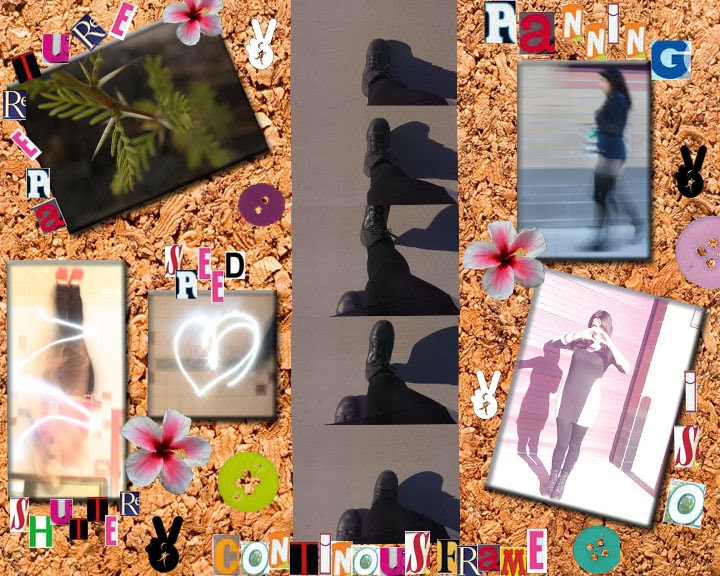
Shutter Speed/Exposure Time - is the effective length of time a camera's shutter is open. If you want to catch a snapshot of something in action (basketball game), you would have a fast shutter speed. A slower shutter speed will allow you to show movement over time. Such as the headlights on a car. You can have one object that is still, and the background display movement.
![]() |
| fast shutter speed |
![]() | ||||
| slow shutter speed, with one object staying still |
| slow shutter speed to capture movement of sparklers |
How to changes settings on camera;
Switch the dial mode to S (Shutter Priority). Same as adjusting the aperture. Choose the +/- to increase and the clock to decrease. Again, watch your display screen to see your changes. Try multiple settings to get the right photo.
Panning - Set your ISO to the lowest setting. Then adjust your shutter speed so that your exposure time is long (slow shutter speed). While the shutter is open, slowly move camera to the left or right to follow the moving subject. You may want to use a tripod for this technique. Begin panning before subject comes into picture. This will take several tries to capture.
![]() | ||
| note: background is blurred, while subject is in focus |
How to change camera settings:
Switch the dial mode to A (Aperture). You will have to set the correct aperture for your shot. Once you have done this step, select menu. Choose camera menu, set the ISO to 400. Then select drive. After you select drive, choose the Hi2. When you are ready to shoot your subject, hold the shutter button down until you have captured the entire shot. Review it to make sure the settings are correct. It should read as a step by step image.
HDR (High Dynamic Range) This is a process that requires one to bracket their frames. The bracketing starts at a low exposure to an over exposure. This process includes 4 plus shots to render in Photoshop for the final image.
How to change camera settings:
Switch the mode dial to M, for Manual. You must look through the viewfinder to see the scale. Use the turn dial by the shutter button to change the settings. Move the dial to the left, you will see the marker move down the scale. After each photo, move the dial so that the marker moves to the right one stop. Take another picture, then continue to do this until the marker is on the right side of the scale.
Shoe Advertisement
Find a shoe advertisement that appeals to you. Save the image, post it to your blog, write three reasons that make this advertisement stand out. We will share our choices in class.
Students will then photograph their shoe, or a peer's shoe to use for their advertisement. Advertisement must demonstrate the skills and techniques students already have learned, plus the new graphic design elements reviewed during this unit.
Tips for a successful Ad:
1. Add Contrast
2. Include Gradients
3. Color
4. Letter Spacing
5. Craftsmanship
6. Alignment
7. Emphasis on the Subject
Tips for a successful Ad:
1. Add Contrast
2. Include Gradients
3. Color
4. Letter Spacing
5. Craftsmanship
6. Alignment
7. Emphasis on the Subject
Monday, December 2, 2013
Artist Research

Choose one of the following artists, keep in mind that each student much select a different artist. If you decide on one, please sign your name on the artist list sheet.
Chuck Close
Annie Leibovitz
Ron English
Shepard Fairey
Jean Michel Basquiat
Keith Haring
Frida Kahlo
Andy Goldsworthy
Andy Warhol
Georgia O'Keeffe
Ansel Adams
Robert Capa
Henri Cartier-Bresson
Dorothea Lange
Pablo Picasso
Vincent Van Gogh
Leonardo Da Vinci
Salvador Dali
Jackson Pollock
Michelangelo
Roy Lichtenstein
Jacob Lawrence
M.C. Escher
Wassily Kandinsky
Edvard Munch
Alexander Calder
Claes Oldenburg
(If you already have an artist that you are interested in, it is a possibility to complete this project on that person. Just ask)
Artist Research Assignment
For the artist you choose, you must make a new post on your blog that contains the following:Place/date of birth and death (if applicable)
Primary type of artwork (ex. painting, drawing, sculpture, photo)
Media (what materials are used)
Style or period of art
Short definition of that style or period (see artlex or artcyclopedia)
Interesting/Personal information on the artist (must list 3 facts)
Quote from artist (optional)
At least 3 images of their work
*Extra Credit - Complete a piece of art that mimics your artist's style
List References
Movie Scene
After learning several adjustment techniques, students will have the chance to place themselves in a movie scene. They must provide a statement that gives the viewer the foundation on which they chose this scene. Students will have to conduct a photo shoot, in order to capture the exact pose they will need to successfully blend themselves into the image. They will then have to make certain adjustments that may include lighting, clothing, animation, etc.
Sunday, November 17, 2013
Vector Portrait
Students will use the pen tool to create paths, of which will define the portrait. They will then use the burn and dodge tools for details to give the portrait some depth/
Who is a person that you look up to? Why is this person important, or serve as a role model? This person can also be yourself. Use this person as your subject to create a vector portrait.
Subscribe to:
Posts (Atom)